TV isn't like it used to be. We have so much to choose from. We channel surf and we skip commercials. As a result, the web video is becoming more and more popular. People are looking to the web more and more now to watch what they want, when they want to watch it and cooking shows are no different.
I recently watched an episode of Chef Michael Smith's new web series called Chef Michael's Kitchen. Perhaps the best part about this web series is you can watch it on your laptop or smart phone right in the kitchen when you're making something. Sure, you can look up the recipe from the episode of Chef at Home you watched last week, but being able to watch it step-by-step, right in the kitchen, is the ideal situation for any at-home cook.
I also like how different the look of the videos are to his show. They're a little more rustic looking and look less "produced". I am drawn to the look of them, although I realize they may not be everyone's cup of tea.
Check it out:

Friday, November 25, 2011

Friday, November 18, 2011
Thai Green Curry chicken
I apologize because I actually have blogged about this meal before. But, it's so good, I think it deserves a second blog (with step-by-step photos this time).
This meal is perfect any day of the week and it's a great way to use up vegetables that you may have just sitting in the fridge. Because it's essential a stir-fry/soup, there are no rules with regards to what you can and can't put in.
*Just a note: green curry doesn't resemble your typical, yellow Indian curry in any way, shape or form. If you are thinking about skipping over this recipe because you don't like curry, just give it a try! Green curry is a really good example of the perfect balance between salty, sweet and spicy. It's nothing like Indian curry and everyone I've ever introduced it to has loved it!
Here's what I used in mine:

3 cans of coconut milk (which made a HUGE batch)
Thai green curry paste (I got mine at an Asian food store but they have it at regular grocery stores. I believe the brand is Thai Kitchen which I actually like more than the one I used)
Chicken breasts and thighs (I like the mix of white and dark meat)
Lime zest
Fresh Basil and/or cilantro
A whole whack of vegetables (I think I used broccoli, mushrooms, green and red pepper)
Minced onion or shallot
Thai Jasmine rice for serving the whole thing over
What to do:
 I started by browning the chicken. I did this in two batches because I had a pound of both thighs and breasts. I always do this even though most recipes just tell you to add it in the broth and cook for 20-25 minutes. This is just too long for me and I like to have a little brown on my chicken. If you poach the chicken in broth, you won't get any colour on it at all.

 Next, remove the chicken and sauté the shallots in a little bit of oil just until soft.
 Once the shallots are soft, you can add the other vegetables. I covered them at this point just to help steam them a little. I like my vegetables pretty crispy so I didn't cook them for long but anywhere from 4-8 minutes should do the trick.
 Next, I added the coconut milk, curry paste and lime zest. I ended up using a lot more curry past than I thought I would, probably because I wasn't as big of a fan of the brand I used as I am of the Thai Kitchen brand. I would say for a batch this size though you would need to add about 5 tbsp. Do it gradually though and taste in between so you can get the exact amount of spice you want.
 Then, add back in the cooked chicken.
 At the last minute, add in the chopped fresh basil. Basil is a delicate herb and if you add it any earlier, it will completely lose its flavour.
 Serve over rice and enjoy!
This meal is perfect any day of the week and it's a great way to use up vegetables that you may have just sitting in the fridge. Because it's essential a stir-fry/soup, there are no rules with regards to what you can and can't put in.
*Just a note: green curry doesn't resemble your typical, yellow Indian curry in any way, shape or form. If you are thinking about skipping over this recipe because you don't like curry, just give it a try! Green curry is a really good example of the perfect balance between salty, sweet and spicy. It's nothing like Indian curry and everyone I've ever introduced it to has loved it!
Here's what I used in mine:

3 cans of coconut milk (which made a HUGE batch)
Thai green curry paste (I got mine at an Asian food store but they have it at regular grocery stores. I believe the brand is Thai Kitchen which I actually like more than the one I used)
Chicken breasts and thighs (I like the mix of white and dark meat)
Lime zest
Fresh Basil and/or cilantro
A whole whack of vegetables (I think I used broccoli, mushrooms, green and red pepper)
Minced onion or shallot
Thai Jasmine rice for serving the whole thing over
What to do:


Friday, November 11, 2011
The Best (Traditional) Grilled Cheese
Now, I know I've blogged about grilled cheese before; a fancy grilled cheese inspired by one I had in Minneapolis but I'd like to take this time now to blog about my favourite way to make a traditional grilled cheese.
I'm a huge fan of the grilled cheese sandwich and I can honestly say I can and have had it for breakfast, lunch and dinner. But, I like my grilled cheese with a tiny add-on. Onions. Yes, I said onions. My dad is the one who got me started with this trick and I never have a grilled cheese any other way now. I wonder if I'm the only one who does this... (besides my dad of course) If it sounds weird to you, don't knock it until you try it. Seriously. It's so delicious. The onions soften and "cook" a little in the sandwich and offer a tiny crunch, tang and sweetness. And, I dip my grilled cheese in ketchup of course. (Not everyone does this - weird, I know)
 I use Natural Bakery rye bread because it's my favourite (it's better if you buy the larger, longer loaf because then you get larger slices). I also have the old cheddar that's already sliced. I think it's from Costco.
 Then, butter both of the outside slices of the bread and throw in a pan. Make sure you're patient and do it over very low heat. Otherwise, you'll burn the bread before the cheese inside melts.
 Then, when it looks like this, flip it over! It'll take probably around 4 minutes or so. Honestly, once you've done this enough, you'll know by smell. I know it's time to flip when I start to smell toasty bread.
 And when it's golden brown on both sides and the cheese is melty, slice in half and serve with a big blob of ketchup. Yum!
I'm a huge fan of the grilled cheese sandwich and I can honestly say I can and have had it for breakfast, lunch and dinner. But, I like my grilled cheese with a tiny add-on. Onions. Yes, I said onions. My dad is the one who got me started with this trick and I never have a grilled cheese any other way now. I wonder if I'm the only one who does this... (besides my dad of course) If it sounds weird to you, don't knock it until you try it. Seriously. It's so delicious. The onions soften and "cook" a little in the sandwich and offer a tiny crunch, tang and sweetness. And, I dip my grilled cheese in ketchup of course. (Not everyone does this - weird, I know)


Sunday, November 6, 2011
Slimmed-down Spinach Dip
I'm going to a wedding shower today so naturally I thought it fitting to contribute to the food supply (especially because dips and appetizers are usually my favourite to make). I tried this recipe that I found on Foodnetwork.ca and I think it turned out pretty well! (We sampled it last night because I made two batches). The recipe is from a show I watch occasionally called Eat, Shrink and Be Merry hosted by two sisters named Janet and Greta. I like the concept of the show - they take really fattening recipes and come up with healthier alternatives - but to be honest, I just can't stand the women who host it. They are quite irritating to say the least.
But with all that said, the recipe was good so I'm going to share it with you.
What you'll need:
1 can artichoke hearts (not marinated) - I couldn't find this so I actually bought a jar of marinated artichoke hearts and rinsed them.
1/2 yellow onion, coarsely chopped
3 large cloves of garlic, peeled and cut into thirds
1 tbsp olive oil
salt and pepper
1 can white kidney beans, drained and rinsed
1 cup light sour cream
1 pkg light garden vegetable cream cheese
1/2 tsp grated lemon zest
4-5 dashes hot pepper sauce
1/2 pkg frozen spinach, thawed, squeezed dry and chopped
1 cup shredded asiago cheese

1. Preheat oven to 425 degrees.
2. Drain artichokes and pat dry. Roughly chop artichokes and toss them with the onions and garlic. Drizzle with olive oil and sprinkle with salt and pepper. Mix well and roast uncovered for about 30 min (give them another toss when they're halfway through).
 (I made two batches, that's why it's divided like that)
3. While vegetables are roasting, place kidney beans, sour cream, cream cheese, lemon zest, and hot pepper sauce in the food processor. Whirl until smooth.

4. Remove artichoke mixture from oven. Reduce oven temperature to 375. Let vegetables cool for a few minutes, then add them to the food processor. Pulse on and off until the mixture is well blended but still chunky.

5. Transfer to a bowl and stir in spinach and all but about 2 tbsp of the cheese.

6. Spoon the mixture into a casserole dish and top with the remaining cheese.

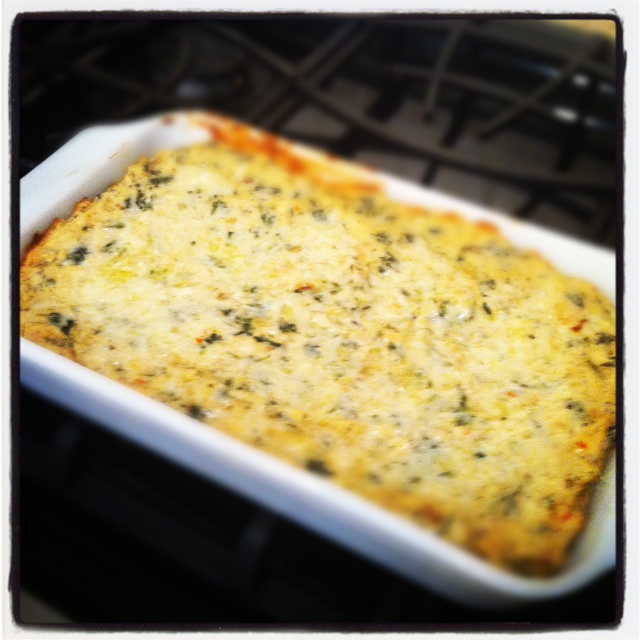
7. Bake, uncovered for about 30 minutes until it bubbles and the cheese gets a little bit of colour. Then, serve with pita chips or crackers!
This isn't part of the recipe but I thought I'd give you a tip on the spinach.
I microwaved mine for just under two minutes in a casserole dish. This is what it looked like:

Once it's thawed, I took it in handfuls and squeezed it over the sink to get the water out. It's unbelievable how much water you can squeeze out of cooked spinach. I then transferred it to about 12 paper towels layered on top of one another and squeezed out oven more liquid until what you have looks like a green hockey puck.

But with all that said, the recipe was good so I'm going to share it with you.
What you'll need:
1 can artichoke hearts (not marinated) - I couldn't find this so I actually bought a jar of marinated artichoke hearts and rinsed them.
1/2 yellow onion, coarsely chopped
3 large cloves of garlic, peeled and cut into thirds
1 tbsp olive oil
salt and pepper
1 can white kidney beans, drained and rinsed
1 cup light sour cream
1 pkg light garden vegetable cream cheese
1/2 tsp grated lemon zest
4-5 dashes hot pepper sauce
1/2 pkg frozen spinach, thawed, squeezed dry and chopped
1 cup shredded asiago cheese

1. Preheat oven to 425 degrees.
2. Drain artichokes and pat dry. Roughly chop artichokes and toss them with the onions and garlic. Drizzle with olive oil and sprinkle with salt and pepper. Mix well and roast uncovered for about 30 min (give them another toss when they're halfway through).

3. While vegetables are roasting, place kidney beans, sour cream, cream cheese, lemon zest, and hot pepper sauce in the food processor. Whirl until smooth.

4. Remove artichoke mixture from oven. Reduce oven temperature to 375. Let vegetables cool for a few minutes, then add them to the food processor. Pulse on and off until the mixture is well blended but still chunky.

5. Transfer to a bowl and stir in spinach and all but about 2 tbsp of the cheese.

6. Spoon the mixture into a casserole dish and top with the remaining cheese.

7. Bake, uncovered for about 30 minutes until it bubbles and the cheese gets a little bit of colour. Then, serve with pita chips or crackers!

This isn't part of the recipe but I thought I'd give you a tip on the spinach.
I microwaved mine for just under two minutes in a casserole dish. This is what it looked like:

Once it's thawed, I took it in handfuls and squeezed it over the sink to get the water out. It's unbelievable how much water you can squeeze out of cooked spinach. I then transferred it to about 12 paper towels layered on top of one another and squeezed out oven more liquid until what you have looks like a green hockey puck.

Thursday, October 27, 2011
Baby it's Cold Outside, Give me Curry
When the weather turns cold, I crave something warm in my belly. Soup, chilli, and mac n' cheese are often on the menu at my house. Winter's coming so it's time to start stocking up on those foods to warm you up from the inside out.
Another warming food I really enjoy is a curry. I love curry - all colours - but yesterday I was craving a yellow Indian curry so that's what I decided to make! I took some photos throughout so I hope that helps you with the recipe.
What you will need:
3 chicken breasts cut into bite-sized peices
any vegetables you have also cut into uniform pieces (I used snap peas, baby carrots, onions and celery but feel free to use anything you have in the fridge)
2 cloves of garlic, minced
3 tbsp curry powder
1 tsp ground cinnamon
1 tsp paprika
1/2 tsp fresh ginger (A really good trick for this is to keep it in the freezer so you have some on hand all the time for grating - buy a piece, give it a bit of a peel and then stick it in the freezer. You can then take it out and grate whatever you need when you have a recipe that calls for fresh ginger)
1 bay leaf (I used it, that's why it's in the picture but I don't think you really need it in a dish that has such a strong flavour. I think it gets lost.)
1/2 tsp white sugar
1 tbsp tomato paste
1 can coconut milk
1 cup plain yogurt

What to do:
Start by browning the chicken and then set aside.

Next, soften the onions in a pan. Add the garlic and the vegetables to get them a little soft (I like my vegetables really crispy so I don't leave them for very long.
Then, add the spice mixture (cinnamon, curry, ginger, sugar, paprika, s & p) along with the tomato paste and coconut milk.

Heat this for a few minutes just to give the vegetables a bit more time to soften.
Then, add the chicken back into the mixture.

And the yogurt.

Now, all you have to do is mix everything up and let it heat through until it's bubbling. And, serve over rice. I like jasmine rice but you can use anything you'd like.

Another warming food I really enjoy is a curry. I love curry - all colours - but yesterday I was craving a yellow Indian curry so that's what I decided to make! I took some photos throughout so I hope that helps you with the recipe.
What you will need:
3 chicken breasts cut into bite-sized peices
any vegetables you have also cut into uniform pieces (I used snap peas, baby carrots, onions and celery but feel free to use anything you have in the fridge)
2 cloves of garlic, minced
3 tbsp curry powder
1 tsp ground cinnamon
1 tsp paprika
1/2 tsp fresh ginger (A really good trick for this is to keep it in the freezer so you have some on hand all the time for grating - buy a piece, give it a bit of a peel and then stick it in the freezer. You can then take it out and grate whatever you need when you have a recipe that calls for fresh ginger)
1 bay leaf (I used it, that's why it's in the picture but I don't think you really need it in a dish that has such a strong flavour. I think it gets lost.)
1/2 tsp white sugar
1 tbsp tomato paste
1 can coconut milk
1 cup plain yogurt
What to do:
Start by browning the chicken and then set aside.
Next, soften the onions in a pan. Add the garlic and the vegetables to get them a little soft (I like my vegetables really crispy so I don't leave them for very long.
Then, add the spice mixture (cinnamon, curry, ginger, sugar, paprika, s & p) along with the tomato paste and coconut milk.
Heat this for a few minutes just to give the vegetables a bit more time to soften.
Then, add the chicken back into the mixture.
And the yogurt.
Now, all you have to do is mix everything up and let it heat through until it's bubbling. And, serve over rice. I like jasmine rice but you can use anything you'd like.
Friday, October 21, 2011
Garbage Pasta (don't worry, not really)
Don't panic - by garbage I just mean whatever you have leftover in the fridge.
Last night wasn't the first night I took some leftovers and made a delicious meal. How often do you open your fridge and feel like you have nothing when really the crisper is over flowing? Probably more than you'd think.
This meal can't really have a recipe because you'll make it with whatever you happen to have in the fridge. I will give you the recipe for the sauce I made though because it was delicious (and healthy too).
What you will need for the garbage pasta
- 1 pkg of any pasta of your choice
- any vegetables you may have in the fridge (I used cherry tomatoes, broccoli and cauliflower). Some other suggestions: spinach, mushrooms, green or red peppers (or yellow or orange - why not?), baby carrots, bok choy (seems random but who knows?). Really, you can use any vegetable of your choice.
- any leftover meat you have (chicken, shrimp, steaks) I used some chicken sausages I had in the freezer.
All you have to do to make the pasta (make sure you salt the water), and throw all your other ingredients in a large saute pan to soften the vegetables.
For the sauce:
1/4 cup of flour
2 cups of chicken broth
1/2 cup of Greek yogurt
1 tsp of garlic powder
1 tbsp of pesto
1/4 cup of parmesan cheese
What to do:
This is an easy way to make a healthier version of a roux (butter and flour mixed together and used to thicken sauce). All I did was take about 1/2 cup of the broth put it together with the flour in an air tight container. I gave it a good shake and then mixed it with the remainder of the broth.
Heat the broth mixture and add the garlic powder. Once it comes to a boil, add the Greek yogurt, parmesan cheese and pesto.
Then, just toss the sauce, pasta and meat and vegetables together and voila! You've got a garbage pasta!
Here's what mine looked like:

Last night wasn't the first night I took some leftovers and made a delicious meal. How often do you open your fridge and feel like you have nothing when really the crisper is over flowing? Probably more than you'd think.
This meal can't really have a recipe because you'll make it with whatever you happen to have in the fridge. I will give you the recipe for the sauce I made though because it was delicious (and healthy too).
What you will need for the garbage pasta
- 1 pkg of any pasta of your choice
- any vegetables you may have in the fridge (I used cherry tomatoes, broccoli and cauliflower). Some other suggestions: spinach, mushrooms, green or red peppers (or yellow or orange - why not?), baby carrots, bok choy (seems random but who knows?). Really, you can use any vegetable of your choice.
- any leftover meat you have (chicken, shrimp, steaks) I used some chicken sausages I had in the freezer.
All you have to do to make the pasta (make sure you salt the water), and throw all your other ingredients in a large saute pan to soften the vegetables.
For the sauce:
1/4 cup of flour
2 cups of chicken broth
1/2 cup of Greek yogurt
1 tsp of garlic powder
1 tbsp of pesto
1/4 cup of parmesan cheese
What to do:
This is an easy way to make a healthier version of a roux (butter and flour mixed together and used to thicken sauce). All I did was take about 1/2 cup of the broth put it together with the flour in an air tight container. I gave it a good shake and then mixed it with the remainder of the broth.
Heat the broth mixture and add the garlic powder. Once it comes to a boil, add the Greek yogurt, parmesan cheese and pesto.
Then, just toss the sauce, pasta and meat and vegetables together and voila! You've got a garbage pasta!
Here's what mine looked like:

Sunday, October 16, 2011
My favourite dip - the green stuff
This post has been a long time coming and I can't believe I've never written about guacamole before!
There are so many different ways to make this delicious green dip and to be honest with you, most of the time, I make it the easy, fast way - with a packaged mix. I know, I know, how can I call myself a foodie if I use this pre-made guacamole mix but it's really good and it also has an ingredient in it that I find even better than citrus for keeping the guac from turning brown.
 This isn't the exact one I buy but I think they're all pretty similar. They're also usually placed right by the avocados in the grocery store.
If however, you are feeling ambitious, you can do it this way (this is my favourite way to make it if I have the time/energy/ingredients):
2 avocados
2 tbsp chopped red onion
1 finely chopped jalapeno pepper
handful of chopped cilantro
juice from 1/2 lime.
lots of s & p
Then, you just mash the avocados and mix in the other ingredients. Serve with tortilla chips.
I also have one of these things which is awesome for scooping the avocado out of the skin.


There are so many different ways to make this delicious green dip and to be honest with you, most of the time, I make it the easy, fast way - with a packaged mix. I know, I know, how can I call myself a foodie if I use this pre-made guacamole mix but it's really good and it also has an ingredient in it that I find even better than citrus for keeping the guac from turning brown.

If however, you are feeling ambitious, you can do it this way (this is my favourite way to make it if I have the time/energy/ingredients):
2 avocados
2 tbsp chopped red onion
1 finely chopped jalapeno pepper
handful of chopped cilantro
juice from 1/2 lime.
lots of s & p
Then, you just mash the avocados and mix in the other ingredients. Serve with tortilla chips.
I also have one of these things which is awesome for scooping the avocado out of the skin.

Or, if you're in the grocery store and craving guacamole but don't feel like making it, they have this at Safeway and apparently at Costco too. I haven't tried it but I'm told it's really good and tastes like the real thing. I've never been a fan of pre-made, store-bought guacamole because it just doesn't taste anything like real avocados - I don't think they're meant to be preserved (they turn brown when they're exposed to the air).

Subscribe to:
Posts (Atom)