Tuesday, January 24, 2012

124 Calorie Pumpkin Cupcakes: tried, tested and delicious

I don't often bake but I found such a great recipe that I had to share. I've recently been using myfitnesspal.com to keep track of what I'm eating and to try and lose a few after the holidays. It's a great app/website by the way. It's free and it has a huge database of food. It makes tracking your calorie/fat/carb/protein intake a breeze. I've been using it for over a month now and I haven't abandoned it out of frustration or boredom so I think that's a good sign.


But, that's not what this post is about. Through the My Fitness Pal forum, I noticed a lot of users using and sharing recipes from a website called skinnytaste.com, a blog written by a woman named Gina. The best part about it is she calculates the nutrition info for each recipe, including the Weight Watchers points.


Even though this recipe is posted on her blog, I took my own photos so I think it deserves a post on mine as well. The original recipe is located here.


What you will need:


Ingredients:
  • Duncan Hines Yellow Cake mix (vanilla or any other white cake mix would work)
  • 2 tsp pumpkin pie spice (if you don't have this pre-mixed spice, you can use a pinch of each ground ginger, nutmeg, cinnamon and all spice)
  • 1 cup canned 100% pure pumpkin
  • 1 cup water
For the Pumpkin Cream Cheese Frosting:
  • 8 oz brick Philadelphia 1/3 fat cream cheese (do not use fat free)
  • 1/2 cup pureed pumpkin (canned is fine)
  • 1 tsp vanilla extract
  • 1 tsp cinnamon
  • 1 tsp pumpkin pie spice
  • 5 tbsp packed brown sugar

Directions:

Preheat oven to 350°. Line a cupcake tin with cupcake wrappers.

Combine cake mix and pumpkin spice in a large bowl. Add pumpkin puree and water, mix about 2 minutes until smooth.


Fill cupcake liners 2/3 full and bake about 20 - 25 minutes, or until a toothpick inserted comes out clean.


This is the part where I got nervous. Because the egg is omitted from the recipe, I wasn't sure how the cupcakes would turn out. The batter wasn't super runny like cake batter usually is. Let me assure you, these cupcakes turned out so well that none of the omitted ingredients were missed (i.e. oil and eggs). But more on that later.


For the frosting, combine the cream cheese, pumpkin, vanilla, cinnamon, pumpkin pie spice and brown sugar until smooth. You can use a spatula to ice the cupcakes or pipe them which may require making more frosting. 


The tops look a little weird but I assure you, they don't taste weird at all and you can't tell when they're iced, obviously.


And the finished product!


The best part about these cupcakes is there is no "fake sugar" like Splenda in the recipe. Not only is that stuff bad for you but you can taste it as well. These were so good that one of my friends actually called them "orgasmic". They are so moist and they have such a wonderful, warm pumpkin flavour!


Just a note* I had a lot of icing leftover - probably enough to make enough batch. I don't like my icing very thick so I only used a thin layer.  

Saturday, January 21, 2012

Healthy lunch idea - salsa and chips

I've been trying really hard to lose those few extra holiday pounds and I've been really careful with what I'm eating lately. I discovered/invented this delicious salsa and chip recipe (or it can be eaten as a salad) that can be eaten as a full lunch. It comes out to be a very large portion and it's absolutely delicious.

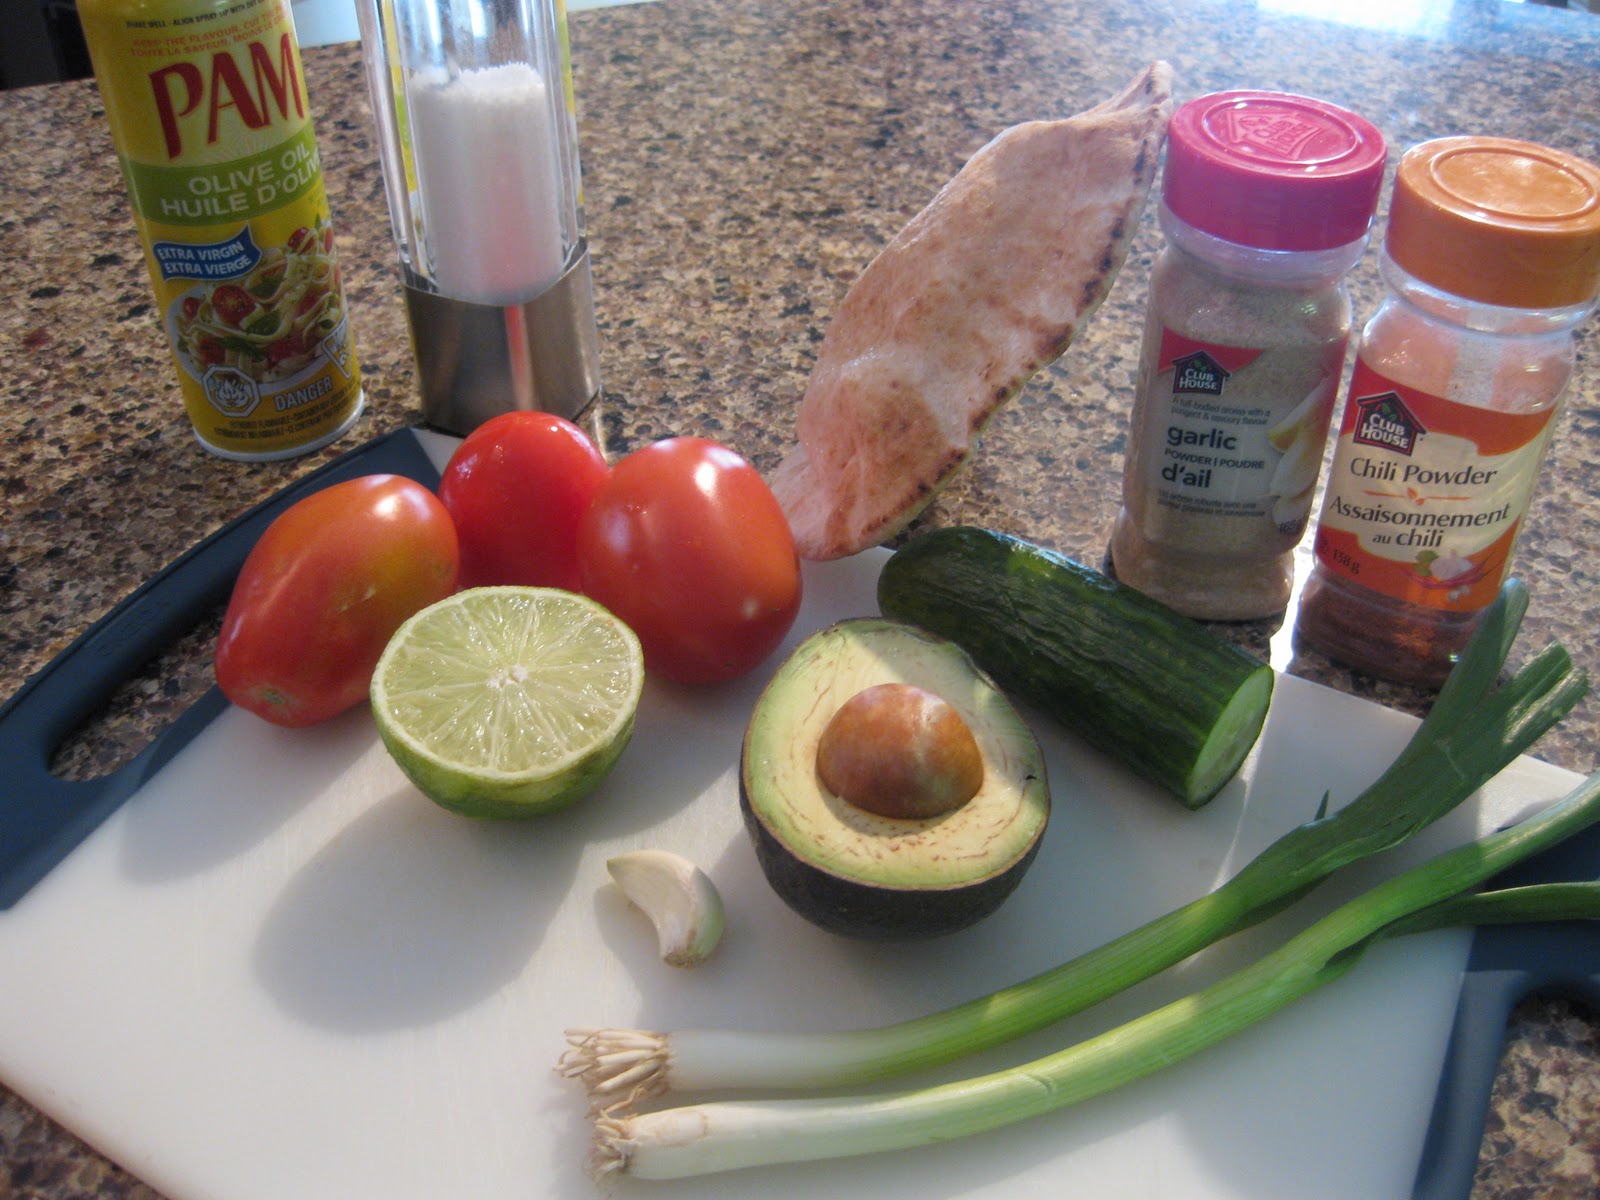
Here's what you'll need:

3 tomatoes (I used roma but if you use something bigger, maybe just 2)
2 cloves of garlic
1/2 an avocado
1 green onion
juice and zest of half a lime
1/3 of a cucumber, peeled
1 whole wheat pita
Pam olive oil cooking spray
garlic powder
chili powder
salt & pepper


To make:

First, I chopped the tomatoes, avocado, cucumbers and green onions into small pieces (so they'd fit easily on a chip).


Then, squeeze in the lime juice and use a garlic press to crush in the garlic (or just mince it finely).


Then, add the desired amount of spices - I'd say about 1/2 teaspoon of each is good. I added some cumin as well. And lots of salt & pepper.


Then, just mix it all up.


To make the chips:

Cut the pita into bite-sized triangles (make sure you separate the two sides of the pita) and lay them out onto a baking sheet. Then give them a light spritz of the cooking spray and sprinkle with salt, garlic powder and chili powder.


Then bake in a 350 degree oven for about 5 minutes or until they are golden and crispy.


I ended up with more salsa than chips but the salsa was really good to just eat with a spoon. It's very light and fresh tasting and I'd say you could eat it on its own as a salad. I also used a spoon to scoop it onto the chips. I think this would be really good with fresh cilantro in it as well but I didn't have any so I'll add it next time!

Friday, January 13, 2012

Appetizers Part 2: The Stuffing

So sorry this has taken so long to post but better late than never, I always say. So here it goes:

After you have all your fillings done, you are ready to stuff. I find the triangle shape works best to keep the stuffings inside as they bake but you can try whatever shape you want. Just make sure you get a bunch of layers of the phyllo pastry as that's what makes it flaky and delicious.

1. Melt some butter and gently brush it on the first layer of phyllo dough. *Note: Keep the unused pastry laid out on the counter with a damp dish towel over top. The dough is very thin and delicate and it will dry out if you don't do this.


2. Next, cut the phyllo in half and then in half again to make 4 long strips. Again, be very gentle with this so you don't tear the pastry. If you do tear it though, remember it's going to be layered so any small imperfections can be easily hidden.


3. Place about a teaspoon of the filling at the bottom of the strips of pastry.


*These were the mushroom ones so I had a small slice of brie cheese in with the filling. 

4. Fold over and over in a triangle until you get to the top. (It's kind of morbid but my dad said it's like how they fold the flag at a military funeral. And my dad's a funeral director so he would know, haha!)


5. Use a little more melted butter to seal at the end and brush the top as well. 


6. Then, place on a large baking sheet to be frozen. After they're frozen, you can move them to a tray or a zip-loc bag so they don't take up as much room in your freezer. 


Next, I tried making some puff pastry appetizers with my blackberry and goat cheese filling. It turned out more "desserty" and I ran out of phyllo so here are some photos of what I did with the puff pastry.


These are little pinwheels (like a jelly roll) with the blackberry on top. They're very cute but I did notice that when I put them in the oven, the dough under the blackberry didn't cook very well. I think when I make these as a dessert, I'll remove the blackberry before baking and then put it back when they're done. I think I'll sprinkle a little powdered sugar on top as well.

This is the cooked blackberry pinwheel. It was really yummy! And a perfect dessert for people who maybe aren't super into sweets as the goat cheese adds a savoury element as well.

And here are the cooked phyllo pastry appetizers. Yes, they were as delicious as they look! (I still have some left too!)

Wednesday, December 21, 2011

Appetizers Part 1: The Fillings

This will be a pretty long post and since I did half of this "project" (I won't call it recipe because technically, there are four different recipes in one here - but don't get scared!) today, and will finish tomorrow, I will post what I did today.

One of my favourite Christmas traditions is to make phyllo pastry appetizers. Finger foods are so popular during the holidays, and it's a lot more fun and cost-effective to make your own. I started doing this a couple of years ago and every year I get a little more creative with it. This year, I also bought some puff pastry so I'll let you know how that turns out.

This post will be dedicated to showing you what I did for my fillings. I stuck to four this year and as much as I'd like to do more, sometimes it just gets to be a little too much, especially when it comes to filling the pastry (which I won't lie, can be kind of tedious and time-consuming, but the end result is worth it, I promise).

So, let's get on with it then.

My first filling I made was my take on the traditional spinach "spanikopita" style.

I used:

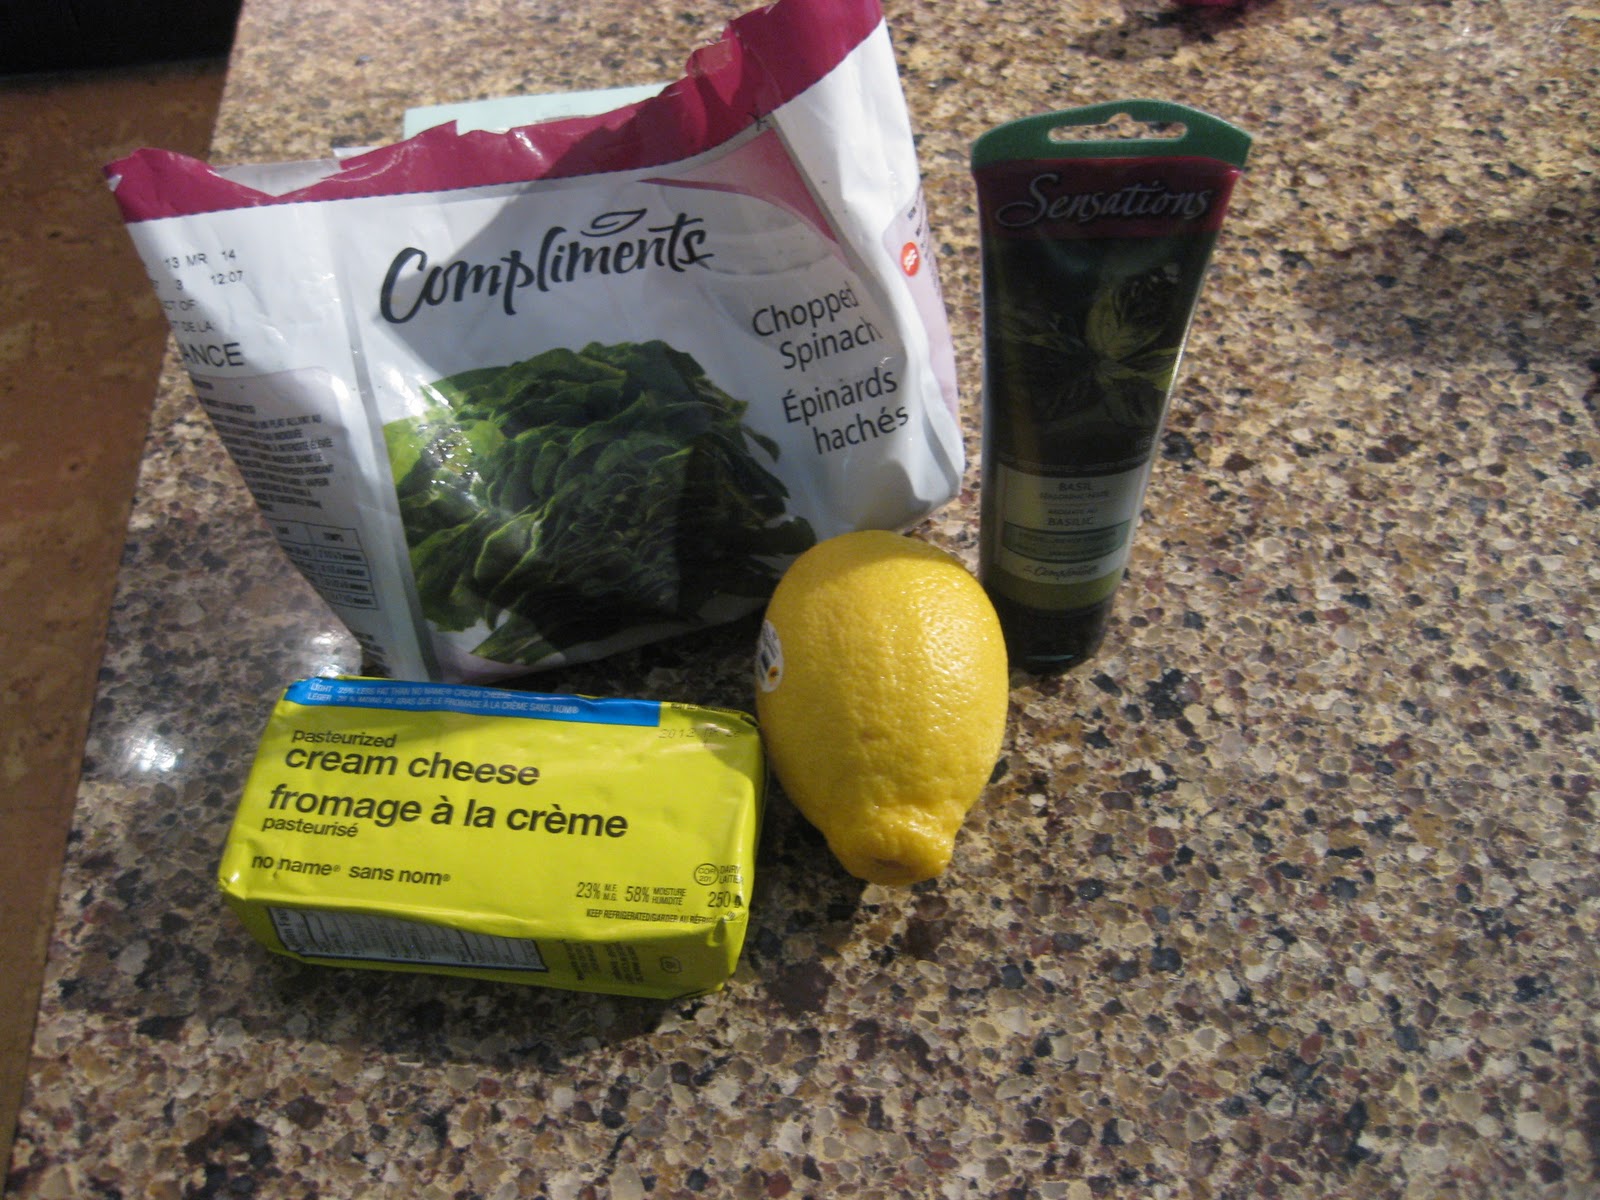
1/2 pkg of frozen spinach, microwaved for about 90 sec and then the water squeezed out
3/4 pkg of cream cheese
squeeze of basil paste from Sobey's
about a tbsp chopped fresh basil
couple tbsps of freshly grated parmesan cheese
juice and zest of half a lemon (to brighten the flavours)
S & P

(Not all of the ingredients are shown in the picture because I kind of make these up as I go along!)


And this filling turned out like this:


I used the same mixer for all of these - I just emptied the fillings into containers and then rinsed and wiped out the bowl, spatula and beater. It wasn't that annoying, trust me.

The next filling I made actually turned out to be something I'm going to use as a dessert. I wanted to do sort of a sweet and savoury kind of thing and it just turned out like more of a dessert flavour. It's still very good but I might serve it as a dessert instead of an appetizer.

What I used:
Goat cheese (half the pkg pictured)
1/4 pkg cream cheese
2 heaping tsp blackberry jam
zest and juice of half a lemon
S & P


When I make these, I'm going to put a fresh blackberry in each little pastry.


The next one I made was with crab and I think it turned out really well.

I used:
1/2 pkg cream cheese
1 can of crab meat (PC brand - highly recommend)
1-2 tbsp chopped fresh chives (I just use kitchen scissors and cut these into the bowl - very easy)
juice and zest of half a lemon
1-2 tbsp fresh grated parmesan cheese
S & P


The last one is a favourite of my family's and it's the most time consuming so I left it to last.

What I used:
2-3 cups of chopped mushrooms
3 cloves of garlic, crushed
3 finely chopped shallots
tsp dried thyme
S & P
1 tbsp butter

These ingredients I threw in a pan to saute and soften before I combined them with the cream cheese.


3/4 pkg cream cheese
1-2 tbsp parmesan cheese


I'm also going to but a small slice of brie cheese with each of these mushroom ones when I stuff them.

Stay tuned for part 2!

Friday, December 9, 2011

Recipes to come over Xmas

Hey friends,

I apologize if I've been a little absent lately but it's been so busy in my life, I haven't cooked a meal apart from KD and frozen pizzas. Let's face it, those are not blog-worthy meals.

But, the good news is, it's the last day of school and that means Xmas holidays are upon us. I will have oodles of time to cook delicious food I can blog about.

Just a taste of the recipes to come:

shortbread cookies

phyllo pastry appetizers 

stuffed mushrooms

butter tarts

xmas cookies (although it's unlikely mine will look this nice


Friday, November 25, 2011

Chef Michael Smith web videos

TV isn't like it used to be. We have so much to choose from. We channel surf and we skip commercials. As a result, the web video is becoming more and more popular. People are looking to the web more and more now to watch what they want, when they want to watch it and cooking shows are no different.

I recently watched an episode of Chef Michael Smith's new web series called Chef Michael's Kitchen. Perhaps the best part about this web series is you can watch it on your laptop or smart phone right in the kitchen when you're making something. Sure, you can look up the recipe from the episode of Chef at Home you watched last week, but being able to watch it step-by-step, right in the kitchen, is the ideal situation for any at-home cook.

I also like how different the look of the videos are to his show. They're a little more rustic looking and look less "produced". I am drawn to the look of them, although I realize they may not be everyone's cup of tea.

Check it out:

Friday, November 18, 2011

Thai Green Curry chicken

I apologize because I actually have blogged about this meal before. But, it's so good, I think it deserves a second blog (with step-by-step photos this time).

This meal is perfect any day of the week and it's a great way to use up vegetables that you may have just sitting in the fridge. Because it's essential a stir-fry/soup, there are no rules with regards to what you can and can't put in.

*Just a note: green curry doesn't resemble your typical, yellow Indian curry in any way, shape or form. If you are thinking about skipping over this recipe because you don't like curry, just give it a try! Green curry is a really good example of the perfect balance between salty, sweet and spicy. It's nothing like Indian curry and everyone I've ever introduced it to has loved it!

Here's what I used in mine:


3 cans of coconut milk (which made a HUGE batch)
Thai green curry paste (I got mine at an Asian food store but they have it at regular grocery stores. I believe the brand is Thai Kitchen which I actually like more than the one I used)
Chicken breasts and thighs (I like the mix of white and dark meat)
Lime zest
Fresh Basil and/or cilantro
A whole whack of vegetables (I think I used broccoli, mushrooms, green and red pepper)
Minced onion or shallot
Thai Jasmine rice for serving the whole thing over

What to do:
I started by browning the chicken. I did this in two batches because I had a pound of both thighs and breasts. I always do this even though most recipes just tell you to add it in the broth and cook for 20-25 minutes. This is just too long for me and I like to have a little brown on my chicken. If you poach the chicken in broth, you won't get any colour on it at all.

Next, remove the chicken and sauté the shallots in a little bit of oil just until soft.


Once the shallots are soft, you can add the other vegetables. I covered them at this point just to help steam them a little. I like my vegetables pretty crispy so I didn't cook them for long but anywhere from 4-8 minutes should do the trick.

Next, I added the coconut milk, curry paste and lime zest. I ended up using a lot more curry past than I thought I would, probably because I wasn't as big of a fan of the brand I used as I am of the Thai Kitchen brand. I would say for a batch this size though you would need to add about 5 tbsp. Do it gradually though and taste in between so you can get the exact amount of spice you want.

Then, add back in the cooked chicken.

At the last minute, add in the chopped fresh basil. Basil is a delicate herb and if you add it any earlier, it will completely lose its flavour.

Serve over rice and enjoy!