Tuesday, January 24, 2012

124 Calorie Pumpkin Cupcakes: tried, tested and delicious

I don't often bake but I found such a great recipe that I had to share. I've recently been using myfitnesspal.com to keep track of what I'm eating and to try and lose a few after the holidays. It's a great app/website by the way. It's free and it has a huge database of food. It makes tracking your calorie/fat/carb/protein intake a breeze. I've been using it for over a month now and I haven't abandoned it out of frustration or boredom so I think that's a good sign.


But, that's not what this post is about. Through the My Fitness Pal forum, I noticed a lot of users using and sharing recipes from a website called skinnytaste.com, a blog written by a woman named Gina. The best part about it is she calculates the nutrition info for each recipe, including the Weight Watchers points.


Even though this recipe is posted on her blog, I took my own photos so I think it deserves a post on mine as well. The original recipe is located here.


What you will need:


Ingredients:
  • Duncan Hines Yellow Cake mix (vanilla or any other white cake mix would work)
  • 2 tsp pumpkin pie spice (if you don't have this pre-mixed spice, you can use a pinch of each ground ginger, nutmeg, cinnamon and all spice)
  • 1 cup canned 100% pure pumpkin
  • 1 cup water
For the Pumpkin Cream Cheese Frosting:
  • 8 oz brick Philadelphia 1/3 fat cream cheese (do not use fat free)
  • 1/2 cup pureed pumpkin (canned is fine)
  • 1 tsp vanilla extract
  • 1 tsp cinnamon
  • 1 tsp pumpkin pie spice
  • 5 tbsp packed brown sugar

Directions:

Preheat oven to 350°. Line a cupcake tin with cupcake wrappers.

Combine cake mix and pumpkin spice in a large bowl. Add pumpkin puree and water, mix about 2 minutes until smooth.


Fill cupcake liners 2/3 full and bake about 20 - 25 minutes, or until a toothpick inserted comes out clean.


This is the part where I got nervous. Because the egg is omitted from the recipe, I wasn't sure how the cupcakes would turn out. The batter wasn't super runny like cake batter usually is. Let me assure you, these cupcakes turned out so well that none of the omitted ingredients were missed (i.e. oil and eggs). But more on that later.


For the frosting, combine the cream cheese, pumpkin, vanilla, cinnamon, pumpkin pie spice and brown sugar until smooth. You can use a spatula to ice the cupcakes or pipe them which may require making more frosting. 


The tops look a little weird but I assure you, they don't taste weird at all and you can't tell when they're iced, obviously.


And the finished product!


The best part about these cupcakes is there is no "fake sugar" like Splenda in the recipe. Not only is that stuff bad for you but you can taste it as well. These were so good that one of my friends actually called them "orgasmic". They are so moist and they have such a wonderful, warm pumpkin flavour!


Just a note* I had a lot of icing leftover - probably enough to make enough batch. I don't like my icing very thick so I only used a thin layer.  

Saturday, January 21, 2012

Healthy lunch idea - salsa and chips

I've been trying really hard to lose those few extra holiday pounds and I've been really careful with what I'm eating lately. I discovered/invented this delicious salsa and chip recipe (or it can be eaten as a salad) that can be eaten as a full lunch. It comes out to be a very large portion and it's absolutely delicious.

Here's what you'll need:

3 tomatoes (I used roma but if you use something bigger, maybe just 2)
2 cloves of garlic
1/2 an avocado
1 green onion
juice and zest of half a lime
1/3 of a cucumber, peeled
1 whole wheat pita
Pam olive oil cooking spray
garlic powder
chili powder
salt & pepper


To make:

First, I chopped the tomatoes, avocado, cucumbers and green onions into small pieces (so they'd fit easily on a chip).


Then, squeeze in the lime juice and use a garlic press to crush in the garlic (or just mince it finely).


Then, add the desired amount of spices - I'd say about 1/2 teaspoon of each is good. I added some cumin as well. And lots of salt & pepper.


Then, just mix it all up.


To make the chips:

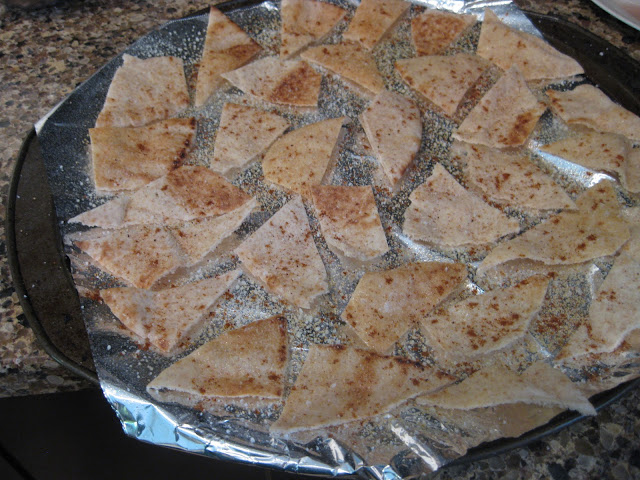
Cut the pita into bite-sized triangles (make sure you separate the two sides of the pita) and lay them out onto a baking sheet. Then give them a light spritz of the cooking spray and sprinkle with salt, garlic powder and chili powder.


Then bake in a 350 degree oven for about 5 minutes or until they are golden and crispy.


I ended up with more salsa than chips but the salsa was really good to just eat with a spoon. It's very light and fresh tasting and I'd say you could eat it on its own as a salad. I also used a spoon to scoop it onto the chips. I think this would be really good with fresh cilantro in it as well but I didn't have any so I'll add it next time!

Friday, January 13, 2012

Appetizers Part 2: The Stuffing

So sorry this has taken so long to post but better late than never, I always say. So here it goes:

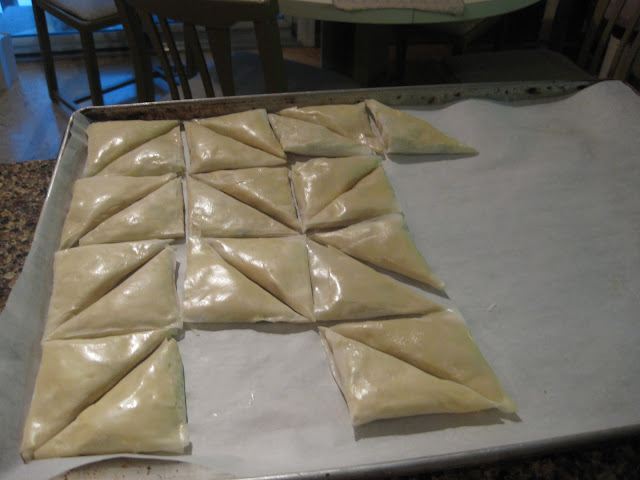
After you have all your fillings done, you are ready to stuff. I find the triangle shape works best to keep the stuffings inside as they bake but you can try whatever shape you want. Just make sure you get a bunch of layers of the phyllo pastry as that's what makes it flaky and delicious.

1. Melt some butter and gently brush it on the first layer of phyllo dough. *Note: Keep the unused pastry laid out on the counter with a damp dish towel over top. The dough is very thin and delicate and it will dry out if you don't do this.


2. Next, cut the phyllo in half and then in half again to make 4 long strips. Again, be very gentle with this so you don't tear the pastry. If you do tear it though, remember it's going to be layered so any small imperfections can be easily hidden.


3. Place about a teaspoon of the filling at the bottom of the strips of pastry.


*These were the mushroom ones so I had a small slice of brie cheese in with the filling. 

4. Fold over and over in a triangle until you get to the top. (It's kind of morbid but my dad said it's like how they fold the flag at a military funeral. And my dad's a funeral director so he would know, haha!)


5. Use a little more melted butter to seal at the end and brush the top as well. 


6. Then, place on a large baking sheet to be frozen. After they're frozen, you can move them to a tray or a zip-loc bag so they don't take up as much room in your freezer. 


Next, I tried making some puff pastry appetizers with my blackberry and goat cheese filling. It turned out more "desserty" and I ran out of phyllo so here are some photos of what I did with the puff pastry.


These are little pinwheels (like a jelly roll) with the blackberry on top. They're very cute but I did notice that when I put them in the oven, the dough under the blackberry didn't cook very well. I think when I make these as a dessert, I'll remove the blackberry before baking and then put it back when they're done. I think I'll sprinkle a little powdered sugar on top as well.

This is the cooked blackberry pinwheel. It was really yummy! And a perfect dessert for people who maybe aren't super into sweets as the goat cheese adds a savoury element as well.

And here are the cooked phyllo pastry appetizers. Yes, they were as delicious as they look! (I still have some left too!)