Wednesday, February 20, 2013

Vegan Moose & "Cheese"

I've been cutting back trying to cut back on my meat intake lately. I watched some documentaries on Netflix. They're very convincing!! Anyway, I'm not going to start preaching or anything because there are many points to be made about the benefits of veganism, many of which meat eaters don't like to hear. I myself am a meat eater but I have been trying to eat more vegetables and I love to cook and try new things so why not try something vegan?

This recipe is from a blog called Healthy Happy Life and is written by a vegan woman who lives in NYC. Her blog is obviously a pretty big deal. One time I emailed to ask her what she fed her cat because I was curious about how she dealt with her beliefs vs. what her cat eats. She never answered me. I swear I wasn't trying to be obnoxious! I was genuinely curious.

Anyway, I made this recipe the other day and I HIGHLY recommend it. Better than any salad I've ever had.

Another reason why I wanted to try this recipe is because I made a veggie burger from her blog a couple of weeks ago and discovered how yummy nutritional yeast is and wanted to use it again!

This Mac & "Cheese" is really good but it's best to get the cheese part out of your head because it doesn't really taste like cheese. Doesn't mean it isn't yummy because it was delicious! Even my super meat-eating boyfriend genuinely enjoyed it. It just doesn't taste like cheese.

This one is her Vegan Mac & Cheese.

6-7 Tbsp nutritional yeast flakes
1 1/2 cups plain soy milk
1 cup sweet potato, mashed
1 tsp garlic powder
1 tsp black pepper
1 tsp apple cider vinegar
1/2 cup onion, finely chopped.
8 oz pasta - I used a whole wheat moose-shaped pasta I got at Ikea Market! 


Directions:

1. Cut up the sweet potato (so it cooks faster) and steam or microwave it. I steamed it on the stove as that's the easiest way for me. 


I got this steamer basket at Ikea but you can pretty much get them anywhere. You just fill the bottom of the pot with a little water, put whatever you want in the basket and then cover.

2. Cook the pasta according to the package directions. 

3. While the pasta's cooking, mix the other ingredients in a bowl.

4. When the sweet potato is ready, mash it and add it to the bowl. I didn't quite mash mine enough so I ended up with orange chunks in the sauce so make sure you mash it really fine. 


5. When the pasta is ready, add it to the sauce. You shouldn't need to heat the sauce but if you'd like to put the works on the stove, that'll make sure it's nice and piping hot! 


I added some panko to the top for that extra crunch!

Tuesday, January 1, 2013

NYE Appie: Smoked Salmon & Arugula Flatbread

Happy New Year! This is my first post of 2013 and I know it's cliche to post a "looking back on 2012" blog but I think 2012 was one of the biggest in my life so far. So I'm going to do it anyway. I finished my IPP, graduated CreComm, moved in with my bf and started working in my first career job. Overall, it's been a really great year and it makes me wonder what 2013 has in store for me!

Now, the first thing you should know before I post one of my NYE appetizer recipes is that I'm a bit of a New Years Eve Scrooge (if there is such a thing). I love the holiday season but new years is always such a disappointment. I feel like if I try to plan something (which I always love to do), no one wants to commit in case something better comes up. I also hate the cold so going out isn't very appealing to me and getting a cab is impossible. So, with all these things stacked against it, NYE isn't ever that spectacular. Last year, we went to a wedding which was perfect because it was planned well in advance, we could dress up and party without having to "put much effort in" so to speak.

Anyway, last night, my bf and I decided just to stay in at our cozy apartment and have a night just the two of us. It was our first NYE in our own place, after all! I wanted to make the night a bit special however, so I made a bunch of appetizers and we drank wine and had a little party for two.

Here's what I made from the Sobeys Inspired magazine:

P.S. This is a great appetizer to serve at parties because it's served basically at room temp. It can sit for an hour or two and not be completely gross.


What you'll need:
- 1 pkg of naan bread (comes in a pack of 4 so you'll have 4 mini salmon flatbreads
- 1 1/2 cups tightly packed arugula
- 1 8oz block of cream cheese
- 1 1/2 tbsp dijon mustard
- 2 tbsp lemon juice
- 2 tbsp capers
- 4 green onions, chopped
- 1 pkg smoked salmon (lox) - make sure it is cold smoked
- S&P

1. Bake the naan bread in a 375 degree oven for about 8 minutes or until it crisps up a little bit. Remove and cool.


2. Combine 1 cup of arugula, cream cheese, mustard, S&P and lemon juice (I always use freshly-squeezed) in a food processor. Pulse until well combined.


3. After the naan bread has cooled, spread the cream cheese mixture evenly.


4. Top with the smoked salmon, capers and green onions.


5. Then, top with the remaining arugula and cut into easy to handle pieces.

I also made stuffed mushrooms and we had a lovely cheese/meat plate!


And the super classy Instagram photo:

Tuesday, December 4, 2012

Dedicated to my Sissy - Quinoa Turkey Nuggets

I know what you're going to say. I should probably just rename this blog to something like, "Quinoa Diaries" but I just love the stuff. And, it's versatile and healthy so I'm not going to apologize for constantly posting recipes about it. Also, it's not my fault because my bf bought me an entire cookbook dedicated to quinoa! I know, super exciting!

These little nuggets are delicious, good for you and super crunchy. They are fantastic on their own or with your favourite dip! I'm a honey-dill girl myself so I've included how I make mine as well.

I also want to dedicate this blog post to my sissy because I think this would be an amazing recipe for her to make. She plays college basketball in Lethbridge and is new to the whole cooking/taking care of herself thing. It's definitely 4 to 18-year-old friendly (and beyond) and would be awesome nutrition for getting her through a million sidelines (you don't wanna know). AND SHE COMES HOME IN A WEEK! Sorry, just got a little excited there. Anyway, Emily, this one's for you!


This recipe is one I adapted and added my own spin to (would you expect anything else?).

What you'll need:
1/2 cup water
1/4 cup quinoa
1 lb ground turkey (or chicken)
1 tsp salt
1/2 cup panko breadcrumbs
1/2 cup parmesan cheese
1/2 tsp dried thyme
1/2 tsp dried basil
1 egg white

Honey-dill sauce:
1/3 cup Miracle Whip
1/4 cup liquid honey
1 tsp dried or fresh dill (fresh is better but I don't always have it)

*I would also feel free to get creative with the seasonings - you don't necessarily need to use thyme and basil, use anything you want!


1. Bring the water and quinoa to a boil in a small saucepan. Reduce to a simmer, cover and cook for 10 minutes. Turn the heat off and leave the covered saucepan on the burner for an additional 5 minutes. Remove the lid, fluff with a fork and set aside to cool. Preheat the oven to 400 F.


2. Combine the ground meat with the quinoa and salt in a medium bowl.


3. In one bowl, place the egg white and in a separate bowl combine the breadcrumbs, cheese, thyme and basil.


4. Lightly grease a large baking sheet or spray with cooking oil. Create even-sized nuggets by using a tablespoon and forming the meat mixture into flat ovals. Dip the nuggets in egg white and then coat in the breadcrumb mixture and place on the baking sheet.


5. Bake for 10 minutes on the centre oven rack. Remove from the oven, flip the nuggets over and bake for an additional 10 minutes.


Combine the ingredients for the honey-dill sauce and mix well!


Mmmm...can't have chicken nuggets without this! (this includes fingers)


I served them with a little cherry tomato, olive & goat cheese salad!


Sunday, November 25, 2012

Perfect for Sunday Afternoon: Soft Pretzels

Every so often I have a weird desire to bake bread or a bread-related snack. I just love the way the house smells and it's the perfect activity to entertain myself for an afternoon. It's 3:30, I have to be somewhere at 5 and I haven't touched my hair or makeup. That gives you an idea of what kind of Sunday afternoon it is.

Anyway, the lack of motivation to get myself ready aside, I thought I'd attempt to make soft pretzels. I've made them before but I didn't remember them turning out very well. Anyway, I just found a recipe on Pinterest and I added rosemary to the dough (because I love it and we have a rosemary Christmas tree, which will likely look worse than Charlie Brown's tree by the time Xmas comes around because I will have used it so much). I also did fine without a dough hook as we don't have a stand mixer. If you don't have one, just use your hands to make sure everything's well combined, then knead for a few minutes until it makes a nice, well-combined, non-sticky ball.

A quick tip: If you aren't planning on serving these IMMEDIATELY, throw them in the freezer RIGHT AWAY after they're cooled. I can't stress this enough, people. If you leave these out for even 24 hours, they will lose their fresh-baked appeal and just be lame, non-exciting soft pretzels. When you want to eat one, throw it in the toaster oven or regular oven for about 5-10 minutes @ 350 and they'll be as good as new again!


This is from a blog I found called The Novice Chef.

One thing to note as well is that if you aren't planning on eating all of these the same day, throw them in the freezer as soon as possible after they cool. This will help them stay fresh. When you want to eat one, just pop in the oven for a few minutes and it will be like they were just baked!

What you'll need:
1 1/2 cups warm (110 to 115 degrees F) water
1 tablespoon sugar
2 teaspoons kosher salt
1 package active dry yeast
22 ounces all-purpose flour, approximately 4 1/2 cups

3 tbsp chopped fresh rosemary
2 ounces unsalted butter, melted
Vegetable oil, for pan
10 cups water
2/3 cup baking soda
1 large egg yolk beaten with 1 tablespoon water
Pretzel salt


What to do:

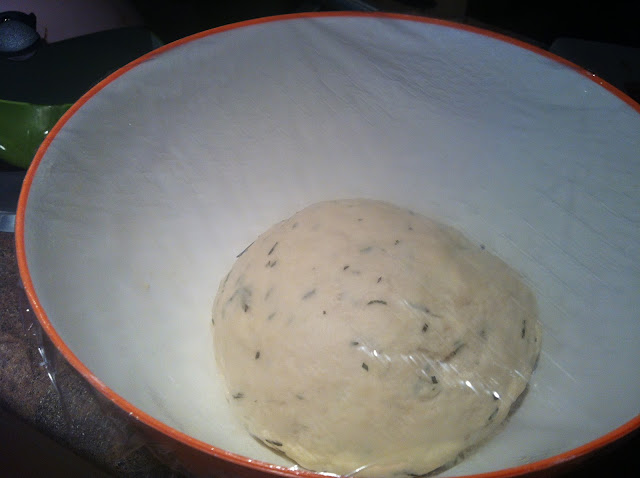
Combine the water, sugar and kosher salt in the bowl of a stand mixer and sprinkle the yeast on top. Allow to sit for 5 minutes or until the mixture begins to foam. Add the flour and butter and, using the dough hook attachment, mix on low speed until well combined. Change to medium speed and knead until the dough is smooth and pulls away from the side of the bowl, approximately 4 to 5 minutes. Remove the dough from the bowl, clean the bowl and then oil it well with vegetable oil. Return the dough to the bowl, cover with plastic wrap and sit in a warm place for approximately 50 to 55 minutes or until the dough has doubled in size.


This is what the yeast looks like when it starts to work. It looks like it foams to the top. If it doesn't do this, your yeast might not be active and you might not end up with delicious, fluffy dough. 


Dough should double in size.

Preheat the oven to 450 degrees F. Line 2 half-sheet pans with parchment paper and lightly brush with the vegetable oil. Set aside.
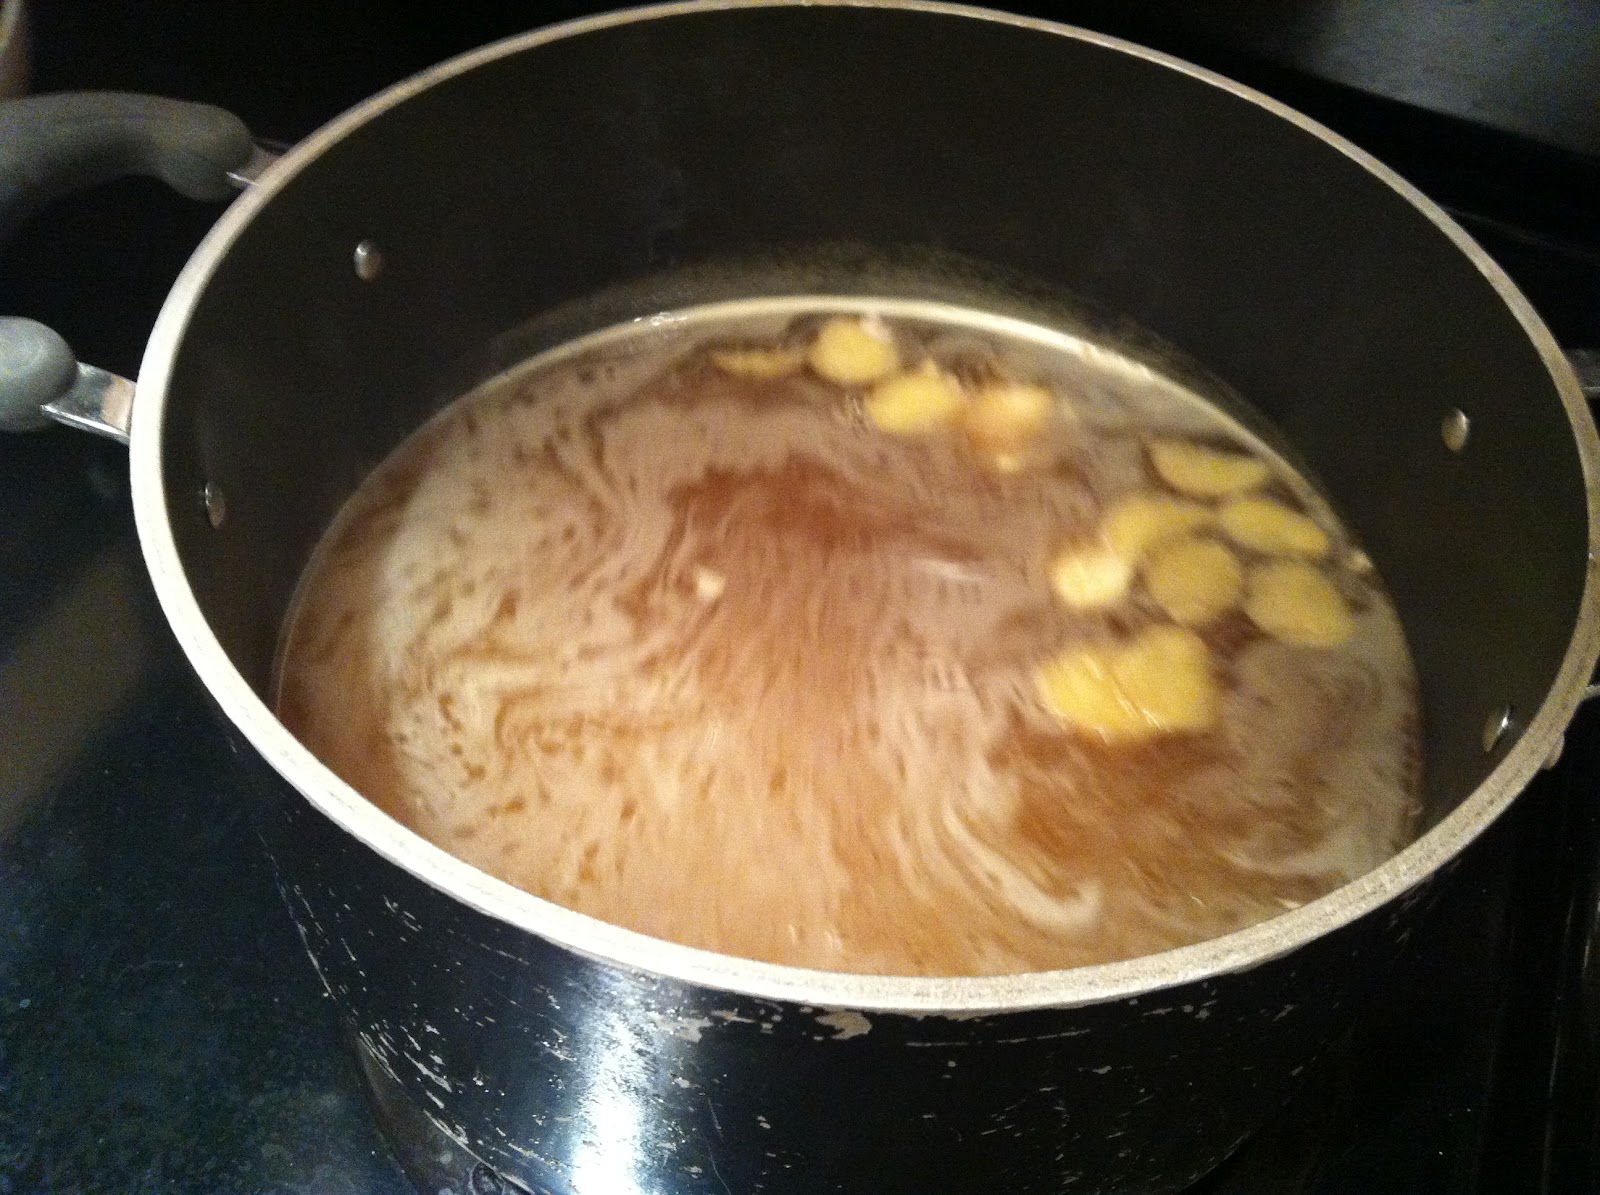
Bring the 10 cups of water and the baking soda to a rolling boil in an 8-quart saucepan or roasting pan.
In the meantime, turn the dough out onto a slightly oiled work surface and divide into 8 equal pieces. Roll out each piece of dough into a 24-inch rope. Make a U-shape with the rope, holding the ends of the rope, cross them over each other and press onto the bottom of the U in order to form the shape of a pretzel. Place onto the parchment-lined half sheet pan.

Place the pretzels into the boiling water, 1 by 1, for 30 seconds. Remove them from the water using a large flat spatula. Return to the half sheet pan, brush the top of each pretzel with the beaten egg yolk and water mixture and sprinkle with the pretzel salt. Bake until dark golden brown in color, approximately 12 to 14 minutes. Transfer to a cooling rack for at least 5 minutes before serving.


Tuesday, November 20, 2012

Festive Quinoa Salad - Perfect for the Holidays!


I sure hope you guys like quinoa because it sure shows up a lot on my blog! My dad actually isn't a huge fan but I usually just make him eat it anyway. It’s good for you, Dad!

Anyhoo, I made this salad to bring to a potluck on Thanksgiving and it was a hit! I think around Thanksgiving and Christmas both, people have a set menu of traditional food. This is great but I also think it’s fun to sometimes mix it up a little and take some traditional flavours and make them new again! This salad would be a perfect addition to any Christmas dinner and it’s festively nutritious as well! It’s also pretty no-fuss as there’s minimal chopping and you don’t have to worry about it getting soggy like you would another salad. In fact, I would recommend dressing this salad a few hours in advance just so the flavours get a chance to mingle. 

I should also mention that this recipe came from a blog I really like called The Fig Tree - with my own twists, of course!

What you will need:

1 box of quinoa
2 tsp Better than Buillon or chicken stock
1 large apple, chopped into small pieces (I used Granny Smith)
1 cup of pecans, toasted & chopped
1/2 cup dried cranberries (Craisins)
1/2 cup feta cheese

Dressing:
3 tbsp apple cider vinegar
3 tbsp olive oil
2 tsp pure maple syrup
1 tbsp dijon mustard
1/2 tsp cinnamon
S & P


1. Cook quinoa according to package directions. I like to use chicken stock instead of just plain water for a little more flavour in mine but you don't have to do this if you don't want to.


2. Whisk together the ingredients for the dressing.


3. Add the components of the salad together and add dressing. This will help to make sure the apples don't turn brown.


4. Let the quinoa cool to room temp and then toss with the salad ingredients. You are now ready to serve!


Thursday, September 27, 2012

Guilt-free Shrimp Hot & Sour Soup

I'm not a big soup eater. There, I said it. It's fall and I'm not that into soup. I know millions of people look forward to this time of year so they can eat soup again without feeling weird/too hot? (I'm not a big seasonal eater - eat what you want, when you want. Who cares?) The only soup I'm totally in love with is coconut green curry soup (and now this one!) This soup is really nice and chunky even though it's a broth based soup - hence my claim that it's guilt-free!

But, for some reason I've had this craving/wanted to try a hot & sour soup. I had these brown rice vermicelli noodles in my pantry and I thought I'd try something different. So, I went to the gym after work, came home and changed, went to the grocery store and started in on this soup. And, now it's 9:20 and we just finished eating! Isn't that always the way with an ambitious weekday dinner plan?

I based this recipe on one I found on FoodNetwork.com.


Ingredients

  • 1 pkg brown rice vermicelli noodles
  • 1 pkg raw shrimp (easy peel - meaning shell on) 400g
  • Sprinkle of salt
  • Few drops sesame oil
  • 2 L chicken stock
  • 1 cup sliced mushrooms
  • 6 thin slices fresh fresh ginger
  • 6 garlic cloves, smashed
  • 5 green onions, sliced
  • Pinch of red pepper flakes
  • 1/4 cup Thai fish sauce
  • 3 teaspoons sugar
  • 1/4 cup whole fresh cilantro leaves
  • 1/4 cup lightly chopped basil 
  • 1/3 cups freshly squeezed lime juice
  • 2 tsp salt


1. Saute the mushrooms with a small handful of the onions. Set aside.


2. Peel the shrimp and set the shells aside. Sprinkle the sesame oil and a sprinkle of salt to the shrimp and keep in the fridge until you are ready to use.

Just a side note - I think it's worth the 2 or 3 extra dollars you pay to get your shrimp already peeled. Unless you have a pretty small amount (like this) it's a huge pain in the you-know-what. I only got this kind because I actually used the shells for something.


3. Simmer the chicken stock for about 20 minutes with the ginger and garlic.


4. Add the shrimp shells and simmer for another 15 minutes.


5. Meanwhile, juice the limes. I juiced 2.5 limes to get 1/3 cup of juice.


6. Strain the broth and discard the shells, ginger and garlic. Then, basically add all the remaining ingredients to the broth (including the mushrooms you set aside earlier). Let the noodles soften (this takes about 3 minutes) and add the shrimp.


7. The shrimp takes no time at all to cook and once it turns pink, it's done. Then, just scoop the works into a bowl and enjoy!